IMPORTANT: Starting with El Capitan and increasingle with later versions Apple has been adding enough (justified) complexity and security to Mac OS X (MacOS) that programs like SMBUp have a hard time running. With Mojave and Catalina it became completely unmanageable. Because of this I’m sorry to declare that SMBUp may not run properly in these platforms and its use is thus unsupported for them and development consequently has stopped.
If you’re using SMBUp to share files through Samba in Mac OS X Lion and Mac OS Mountain Lion, it’s possible you’ve found a problem trying to create new users to share with, along with other issues. This post aims at solving some common problems and explain doubts about the program and its design decisions.
Fact is Apple doesn’t even try to fix some of the internal calls Mac OS X receives from Samba on one side and Samba has no intention to support Mac OS X after Apple dropped support for them with Lion.
- How can I add sharing-only users to SMBUp/Samba shares
- SMBUp warns that user has more than 16 groups
- Finder doesn’t show network drives in the sidebar
- Finder doesn’t show network drives in the sidebar after removing SMBUp
- How can I uninstall SMBUp?
- The Samba installer from SMBUp doesn’t complete. How to install Samba manually?
- How can I scan from my network scanner/MFD into my mac’s shared drives?
- After a Mac OS X Security Update samba can’t be started/”Passing non-absolute shell paths is not currently supported.”
How can I add sharing-only users to SMBUp/Samba shares
You can add custom users to Samba/SMBUp with these steps:
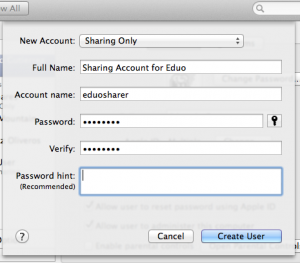
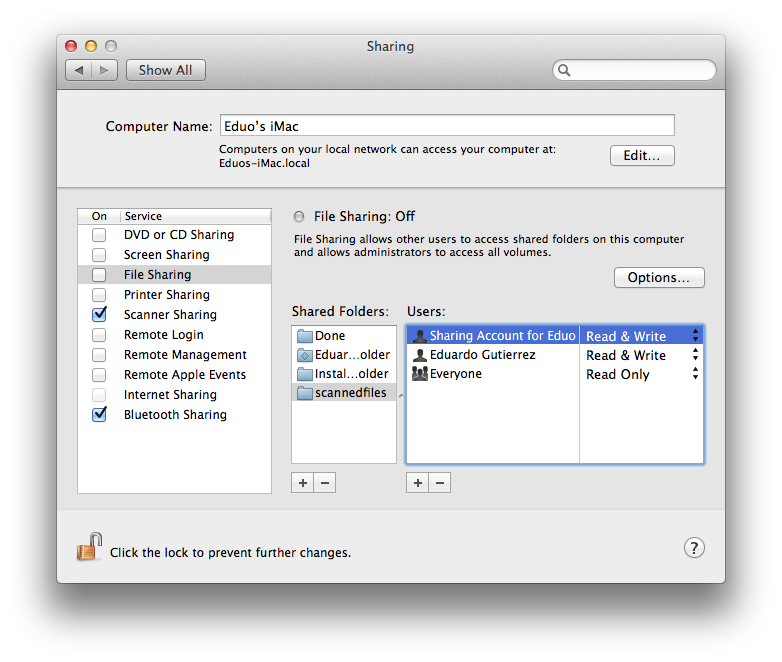
- Create sharing-only user In your “accounts”/”Users & Groups” Preferences section click the “+” to add a new user and select, from the pop-up menu, “Sharing Only”:
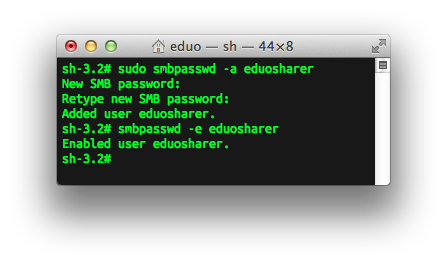
- Add the sharing-only user to Samba issuing these commands in the terminal:
sudo /opt/local/bin/smbpasswd -a newuser
sudo /opt/local/bin/smbpasswd -e newuser
Paste each one separately. Keep in mind the first command will first ask for the administrator password and then for the password for the new user, twice. Replace “newuser” with the user you created in the previous step. If you have Samba installed in a different route replace “/opt/local/bin/” with the proper path.
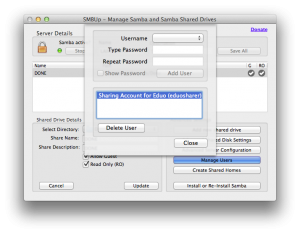
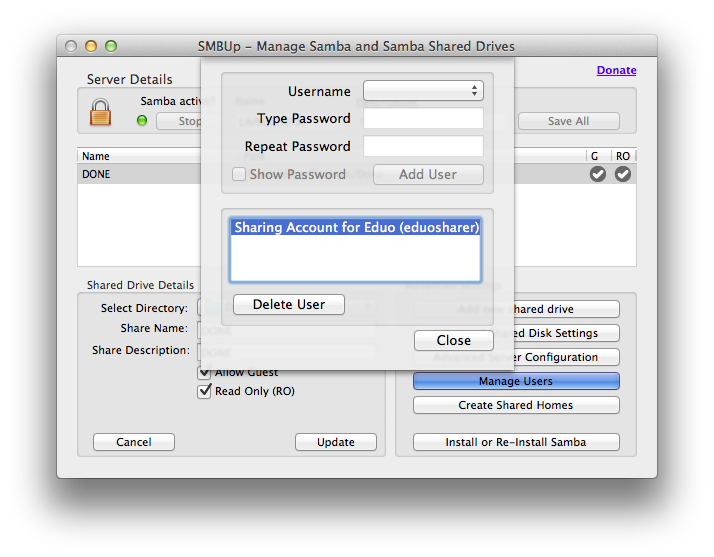
- Confirm that the user shows up and has been added to Samba in SMBUp
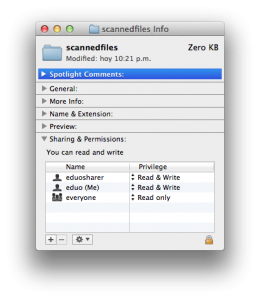
- Assign permissions to the folder you want to share. You can do this in the finder or in the “Sharing” preference pane (do not enable File Sharing or, if you have to, make sure “SMB” is disabled)

- Share the folder in SMBUp if you haven’t already done so.
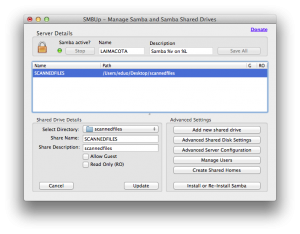


You should then be able to connect to the new shared folder with the newly-created user and permissions should work. NOTE: You can use the force user parameter in smb.conf to map access to this folder to this single user
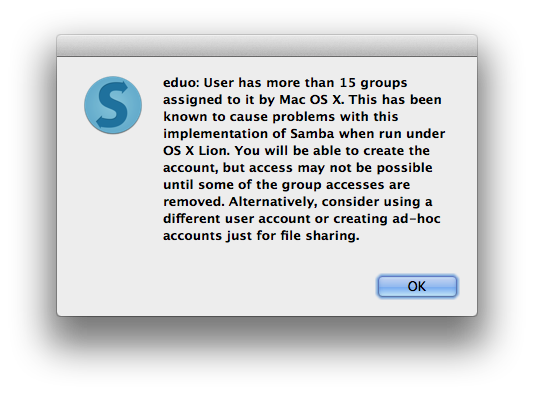
SMBUp warns that user has more than 16 groups
Mac OS X uses a special inheritance method for groups that means many users (and admin users as a rule) will belong to more than 15 groups. Samba has a problem with this as the methods it uses to know how many groups a user belongs to don’t work properly in Lion. When this happens, SMBUp will show a warning message:
To correct this you need to create custom sharing-only users in OS X and add them to Samba directly from the terminal.
Follow the steps in question “How to add sharing-only users to SMBUp/Samba shares” to create these users.
Finder doesn’t show network drives in the sidebar
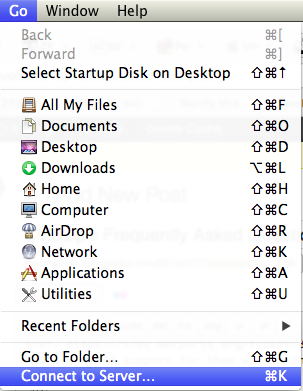
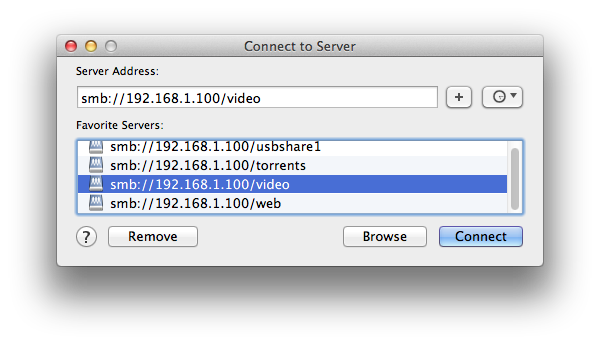
As mentioned in the main SMBUp page this is a necessary side effect of insalling Samba. This is because samba installs its own netbios and SMB managers. These replace the native OS X ones, which is what OS X uses to “discover” network servers. A workaround is to connect to shared drives directly and drag them to the sidebar to create shortcuts for them.
Finder doesn’t show network drives in the sidebar after removing SMBUp
When removing SMBUp sometimes the uninstaller fails to reset the native services as they should be. When this happens the most common result is that the Finder Sidebar doesn’t show servers from the network or that OS X can’t share itself as before. When this happens please follow these instructions:
- In System Preferences -> Sharing -> File Sharing: Check (if unchecked) “Options -> Share Files and Folders using SMB” and uncheck it again.
- In System Preferences -> Network -> Advanced -> WINS: Change your NetBIOS Name to something else and change it back to what you wish it to be.
- Restart
- If the above doesn’t work, execute these commands in the terminal line by line and restart afterwards. Keep in mind you’ll be asked for your administrator password.
sudo launchctl unload -w /Library/LaunchDaemons/org.samba.smbd.plist sudo launchctl unload -w /Library/LaunchDaemons/org.samba.nmbd.plist sudo launchctl load -w /System/Library/LaunchDaemons/com.apple.netbiosd.plist sudo launchctl start com.apple.netbiosd sudo launchctl load -w /System/Library/LaunchDaemons/com.apple.smbd.plist sudo launchctl start com.apple.smbd sudo launchctl load -w /System/Library/LaunchDaemons/com.apple.smb.preferences.plist sudo launchctl start com.apple.smb.preferences - After the above, go to System Preferences and set-up your sharing permissions as you wish.
How can I uninstall SMBUp?
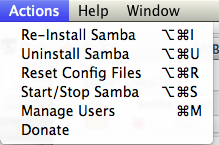
SMBUp includes a menu and screen to uninstall some or all packages it installs originally.
By default the only items marked for uninstall are the scripts that run Samba and the installer files. This means the services would stop running but the files would be kept for future needs.
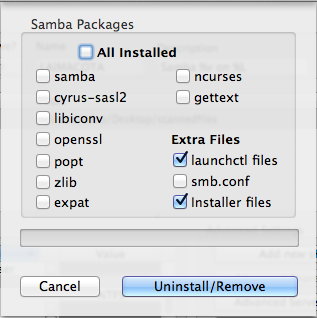
If you decide you don’t want any trace of SMBUp then you can check “All Installed” and all files should be marked for deletion.
NOTE: Sometimes the uninstaller may find errors deleting specific files or folders and these may remain, but the service itself should always be disabled regardless of these possible errors. After uninstalling you can check for the existence of the “/opt” directory and, if it still exists, you can delete it manually((As long as you don’t use MacPorts, which needs it as well.))
The Samba installer from SMBUp doesn’t complete. How to install Samba manually?
Sometimes the integrated Samba installer from SMBUp may hang in the “Preparing to Install…” section. When this happens, if you’ve been waiting for activity for more than 10 minutes, you can safely force-quit SMBUp and install manually.
To be able to install manually you can check if you have a Samba installer disk mounted on your mac and use the installer in it or, if you prefer, download Samba from here and use it instead.
Download Samba 3.2.15 installer for Mac OS (DMG/PKG)
How can I scan from my network scanner/MFD into my mac’s shared drives?
Instructions to scan to network folders shared with Samba through SMBUp should be similar for most platforms.
Instructions for the Kyocera Copystar system
Instructions for HP Network scanners to scan to your share drive:
HP OfficeJet 8500A Pro
HP OfficeJeft 8600 Pro Plus
After a Mac OS X Security Update samba can’t be started/”Passing non-absolute shell paths is not currently supported.”
Donneo has discovered that this error can come up after a system or security update. The
solution is reinstalling samba from the Samba installer that SMBUp includes.